Products catalog
|
Price:
on request
Product information updated 05 February 2026.
Found cheaper?
Let us know. Our price is the best.
Warranty:
12 months.
Warranty extension up to 5 years.
Terms of delivery:
To all regions of the country, international delivery.
Product information updated 05 February 2026.
Found cheaper?
Let us know. Our price is the best.
Warranty:
12 months.
Warranty extension up to 5 years.
Terms of delivery:
To all regions of the country, international delivery.
Technical characteristics
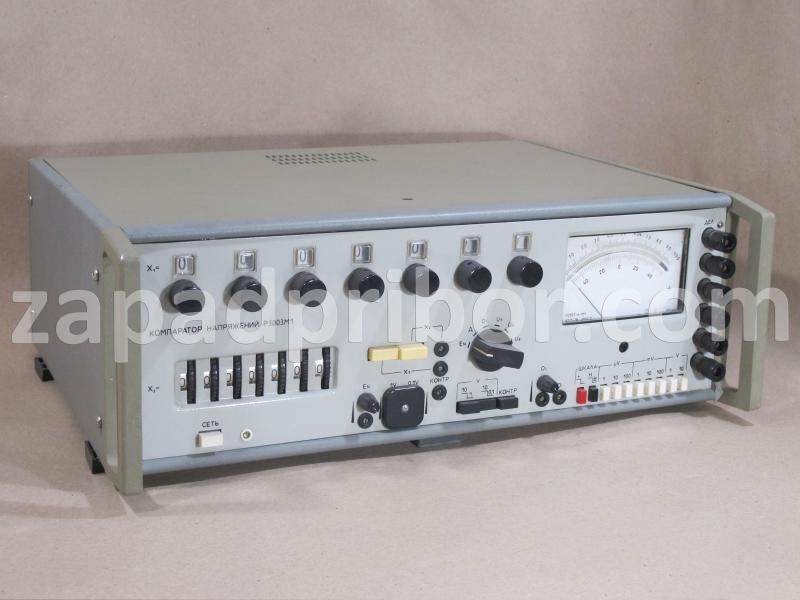
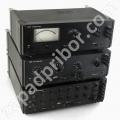
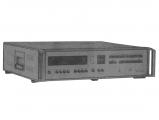
Voltage comparator R3003M1-2 (R 3003M1-2, R-3003M1-2)
Suitable for:
calibration of the stress;
voltage measurement;
issuance of calibrated stress;
Play stresses;
tensions.
Accuracy class of 0.0005.
Voltage comparator R3003M1-2 (hereinafter - the comparators) DC accuracy class 0.0005, designed for:
calibration of the stress;
voltage measurement;
issuance of calibrated stress;
Play stresses;
tensions.
In the comparator R3003M1-2 provided the modes of operation with an external digital and analog output meter. Operating conditions of the comparator:
ambient temperature - 10 ° C to 35 ° C. Relative humidity - 80% at 25 ° C, the line voltage is - (220 ± 22), at 50, 60Hz.
Voltage comparators R3003M1-2, intended for delivery to areas with a tropical climate, consistent execution 0 category 4.1, and operate at a temperature of 10 to 35 ° C. By Type code comparator added 04.1 **. "
Technical data
Voltage comparator
When calibration of measuring stress and collectively function built-in calibrator, differential instrumentation amplifier, differential Microvoltmeter, the input voltage divider.
Information about the calibration of the range (upper range) are shown in Table 1. The limits of acceptable basic error and calibration of the limits of acceptable error in the calibration of the operating conditions of application correspond to those indicated in Table 2. The limits of acceptable basic measurement error in the calibration on a normal element of precision class rank 0,001 II correspond to those indicated in Table 2.
Warm-up time of the comparator - 1 hour setup time precision mode - 4 hours comparator voltage R3003M1-2 provides normalized specifications regardless of the operating time after the establishment of the operating mode.
The differential instrumentation amplifier voltage
The parameters of the differential output instrumentation amplifier voltage (hereinafter - the amplifier) correspond to those indicated in the table. 3. The limits of the amplified voltage 1mkV; 10mkV; 100mkV; 1 mV, 10mV, 100mV, 1V, 10V. Nominal values of the gain, the limits of acceptable error amplifier outputs for CE and AB; limits of acceptable non-linearity of the amplifier output CV correspond to the values indicated in Table. 4 and 5. The input impedance of the amplifier (Ri) is as indicated in Table 6. The output impedance of the amplifier for analog and digital output does not exceed 0.5 ohms.
Input parameters of immunity
Rejection coefficient differential AC voltage (hindrance of normal form) network frequency and dynamic range are shown in Table 6. Factor reject common-mode voltage (common mode):
for AC voltage mains frequency are shown in Table 6;
for DC voltage - not less than 120 dB.
Features duty cycle. Zero offset voltage of the amplifier is not more than 3mkV in operation for 8 hours
Differential Microvoltmeter
Measurement limits microvoltmeter: 1mkV; 10mkV; 100mkV; 1 mV; 10mV, 100mV, 1V, 10V. The limits of acceptable basic error on the upper scale indicating device and the limits of acceptable reduced error in the working conditions of application correspond to those indicated in Table 7.
Response time microvoltmeter as specified in Table 7. Microvoltmeter has:
two rows of scales indicating device;
electric equalizer to set the arrow indicating device to zero the bottom of the scale with an accuracy of ± 0,5 division;
polarity switch indicating device.
The normal position of the scale indicating device - vertical.
Voltage calibrator
Limits calibrated voltages and reproducing stresses are shown in Table. 1. The calibrator is made DIL, semidekadnym. Graduation one stage younger decades, load characteristics, the output resistance are shown in Table 8. The limits of acceptable linearity error of the set voltage calibrator (non-linearity) in normal (basic) and working conditions of application corresponds to exist the limits of admissible values of the error komparirova given in Table 2.
The limits of acceptable basic error in the calibration play by the normal element of accuracy class 0.001 M discharge correspond to those indicated in the table. 2.
The nominal value of the output voltage division factors within the calibrator at 1B, 0.1 V - 10 and 100, respectively. Changing the voltage calibrator does not exceed:
caused by the duration of the inclusion:
25 • 10 -4% - TT s for 8 hours;
5 • 10 -4% - precision mode in 1 hour;
caused by a change in the ambient temperature range zozduha corresponding working conditions of use, 5 • 10 -4% / ° C;
caused by changing the supply voltage of ± 22V of nominal 2 • 10 -4%.
Changing the division factor subgroups caused by changes in ambient temperature in the range of temperatures corresponding to the working conditions of use does not exceed: 5 • 10 -5% / ° C for the range of 1V, 10 • 10 -4% / ° C for the range of 0.1 V. Noise voltage output voltage calibrator (multiplicative component) does not exceed 4 • 10 -5% / ° C (pp)
Time of establishment of the voltage calibrator must not exceed 2 at ΔU = ± (2,5 U + 1) uV
where ΔU - calibrator output voltage deviation from the set point; U - set value voltage, V.
Input voltage divider:
The nominal rate of fission - 100.
Input impedance - 1 MW, with a tolerance of ± 5%. The temperature coefficient of the division factor - not more than 23 • 10 -4% / ° C. The device is equipped with a device for offline verification and adjustment of the divisor.
General characteristics of the comparator
Current consumption from the mains voltage of 220V - no more than 70mA. The insulation between the casing and insulated from the housing of DC circuits, which can be accessed without opening the comparator R3003M1-2 stand for 1 min. test voltage of AC, 50 Hz, which corresponds to the current value:
1.5 kV - joined together between the housing and the input terminals relative to the input mains supply;
0.5 kV - between the body and the input, terminals. Insulation resistance of not less than:
August 10 ohms - between housing supply and commissioning of the network;
Oct. 10 ohms - between the input terminals and connected to the ground input power supply.
Dimensions and weight of the comparator R3003M1-2 do not exceed 488x170x385mm, 13kg.
| Range | Symbol limit in the design documentation |
| When and calibration of measuring DC voltage: compensation method | |
| 11.111110 In | 10B |
| In 1.1111110 | 1B |
| In 0.11111110 | 0.1 |
| using the input voltage divider (Rin = 1M) | |
| In 111.1110 | 100B |
| When issuing a calibrated voltage and playback | |
| 11.111110 In | 10B |
| In 1.1111110 | 1B |
| In 0.11111110 | 0.1 |
Table 2.
| Characterization | Limits on the value of the characteristic | |||
| 10B | 1B | 0.1 | 100B | |
| Limits of error calibration of, uV | ||||
| main | ± (5U +1) | ± (5U +0,1) | ± (6U +0,04) | ± (50U +4) |
| the operating conditions of application | ± (10U +1) | ± (10U +0,1) | ± (20U +0,04) | - |
| Maximum permissible error of measurement and calibration play on a normal element of precision class 0,001 II discharge, mV, with a range of calibration: | ||||
| 1 hour | ± (20U +1) | ± (20U +0,5) | ± (30U +0,5) | ± (50U +4) * |
| 8 hours | ± (40U +5) | ± (40U +1) | ± (50U +0,5) | - |
| Output | Rated output voltage E | Rated Load | The load resistance is not less than |
| Analog | ± 10V | 5mA | 2K |
| Digital on the range of measurements: | |||
| 1mkV-1B | ± 1V | - | 1000kOm |
| 10B | ± 10V | - | 1000kOm |
Leading online store Zapadpribor - a huge selection of measuring equipment for the best value and quality. So you can buy inexpensive devices, we monitor competitors' prices and are always ready to offer a lower price. We only sell quality products at the best prices. On our site you can buy cheaply as the latest innovations and proven equipment from the best manufacturers.
The site includes a special offer «buy at the best price» - if other Internet resources (bulletin board, forum or announcement of another online service) in products presented on our site, the lower price, we will sell it to you even cheaper! Buyers also additional discount for leaving a review or photo of use of our products.
In the price list contains not the whole range of products offered. Prices of goods, not included in the price list can learn to contact the manager. Also, our managers You can get detailed information about how cheap and profitable to buy instrumentation wholesale and retail. Telephone and e-mail for advice on the purchase , delivery or receipt are shown on the description of the goods. We have the most qualified staff, quality equipment and the best price.
Online store Zapadpribor - the official manufacturer's dealer test equipment. Our goal - selling high quality goods with best price offer and service to our customers. Our store can not only sell you the necessary instrument, but also offer additional services to its calibration, repair and installation. That you have a pleasant experience when shopping on our site, we have provided special gifts guaranteed to the most popular products.
We offer fast international shipping to almost every country in the world: Australia, Austria, Azerbaijan, Albania, Algeria, Anguilla, Angola, Antigua and Barbuda, Argentina, Aruba, Bahamas, Bangladesh, Barbados, Bahrain, Belize, Belgium, Benin, Bermuda, Bulgaria, Bolivia, Bonaire, Sint-E. and Saba, Bosnia and Herzegovina, Botswana, Brazil, British Virgin Islands, Brunei Darussalam, Burkina Faso, Burundi, Bhutan, VietNam, Vanuatu, Vatican City, Venezuela, Armenia, Gabon, Guyana, Haiti, Gamia, Gambia, Ghana, Guatemala, Guinea, Gibraltar, Honduras, Hong Kong, Grenada, Greenland, Greece, Georgia, Denmark, Democratic Republic of the Congo, Jersey, Djibouti, Dominica, Dominican Republic, Ecuador, Eswatine, Estonia, Ethiopia, Egypt, Zambia, Zimbabwe, Jordan Indonesia, Ireland, Iceland, Spain, Italy, Cape Verde, Kazakhstan, Cayman Islands, Cambodia, Cameroon, Canada, Qatar, Kenya, Kyrgyzstan, China, Cyprus, Kiribati, Colombia, Comoros, Congo, Korea (Rep.), Costa Rica, Kot-d'Ivoire, Cuba, Kuwait, Curacao, Laos, Latvia, Lesotho, Lithuania, Liberia, Lebanon, Libya, Liechtenstein, Luxembourg, Myanmar, Mauritius, Mauritania, Madagascar, Macao, Malawi, Malaysia, Mali, Maldives, Malta, Morocco, Mexico, Mozambique, Moldova, Monaco, Monaco, Namibia, Nauru, Nepal, Niger, Nigeria, Netherlands, Germany, New Zealand, New Caledonia, Norway, UAE, Oman, Cook Islands, Pakistan, Palestine, Panama, Papua New Guinea, Paraguay, Peru, South Africa, Poland, Portugal, Republic of Chad, Rwanda, Romania, El Salvador, Samoa, San Marino, Saudi Arabia, Swaziland, Seychelles, Senegal, Saint Vincent and the Grenadines, Saint Kitts and Nevis, Saint Lucia, Serbia, Singapore, Sint Maarten, Slovakia, Slovenia, Solomon Islands, United Kingdom of Great Britain and Northern Ireland, Sudan, Suriname, East Timor (Timor-Leste), USA, Sierra Leone, Tajikistan, Taiwan, Thailand, Tanzania (United Republic of), Togo, Tonga, Trinidad and Tobago, Tuvalu, Tunisia, Turkey, Turkmenistan, Uganda, Hungary, Uzbekistan, Uruguay, Faroe Islands, Fiji, Philippines, Finland, France, French Polynesia, Croatia, Central African Republic, Czech Republic, Chile, Montenegro, Switzerland, Sweden, Sri Lanka, Jamaica, Japan.
We also provide such metrological procedure: calibration, tare, graduated, testing of measuring instruments.
The online store takes an active part in such procedures as electronic bidding, tender, auction.
If there is no site in the descriptive information you need on the device you can always turn to us for help. Our qualified managers will update for you on the technical characteristics of the device from its technical documentation: user manual, certificate, form, operating instructions, diagram. If necessary, we will take a photo of your device, or a device stand. You can leave feedback on the unit purchased from us, the meter, the device, indicator, or product. Your review for your approval will be published on the site without contact information.
Description of the instruments taken from the technical documentation or technical literature. Most pictures of products made directly by our experts prior to shipment of goods. In the description of the device provided the main technical characteristics of the instrument: nominal measuring range, accuracy class, scale, supply voltage, size (size), weight. If the site you see the discrepancy device name (model) specifications, photo or documents attached - let us know - you will get a useful gift with-selling device.
While the need to clarify the overall weight and size or the size of the individual meter you can in our service center. If you need our engineers will help you choose the most complete analog or a suitable replacement for the device you are interested. All counterparts and replacement will be tested in one of our laboratories with the full compliance to your requirements.
In the technical documentation for each device or product, information is provided on the list and amount of precious metals content. The documentation gives the exact weight in grams of precious metals: Au gold, palladium Pd, platinum Pt, silver Ag, tantalum Ta and other platinum group metals (PGM) per unit item. These precious metals are found in nature in very limited quantities and therefore have such a high price.
On our website you can familiarize yourself with the technical characteristics of devices and obtain information on the content of precious metals in devices and radio components manufactured in the USSR. We draw your attention to the fact that often the actual content of precious metals differs by 10-25% from the reference one in a smaller direction! The price of precious metals will depend on their value and mass in grams.
All text and graphic information on the site is informative. The color, shade, material, geometric dimensions, weight, content, delivery set and other parameters of the goods presented on the site may vary depending on the batch of production and year of manufacture. Check with the sales department for more information.
If you can make repairs to the device yourself, our engineers can provide you with a complete set of necessary technical documentation: circuit diagram TO, ER, FD, PS. We also have an extensive database of technical and metrological documents: technical specifications (TS), the terms of reference (TOR), GOST (DSTU), the industry standard (OST) test procedure, the method of certification, verification scheme for more than 3,500 types of measuring equipment from the manufacturer this equipment. From the site you can download all the necessary software (the software driver) is required for the product purchased.
We carries out repairs and maintenance of measuring equipment in more than 75 different factories of the former Soviet Union and CIS.
We also have a library of legal documents that are related to our field of activity: the law, code, ordinance, decree, temporary position.
