Products catalog
Price:
on request
Product information updated 01 February 2026.
Found cheaper?
Let us know. Our price is the best.
Warranty:
12 months.
Warranty extension up to 5 years.
Terms of delivery:
To all regions of the country, international delivery.
Product information updated 01 February 2026.
Found cheaper?
Let us know. Our price is the best.
Warranty:
12 months.
Warranty extension up to 5 years.
Terms of delivery:
To all regions of the country, international delivery.
Technical characteristics
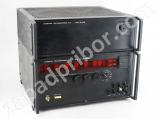
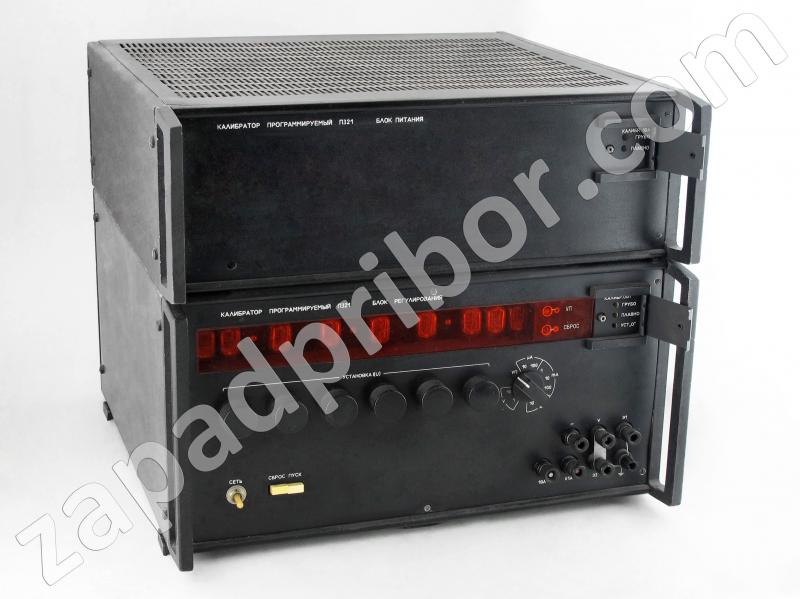
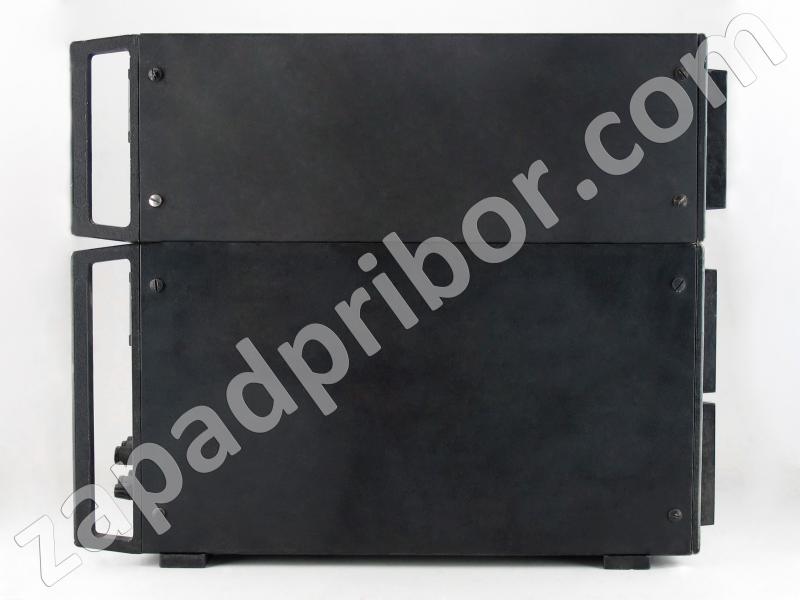
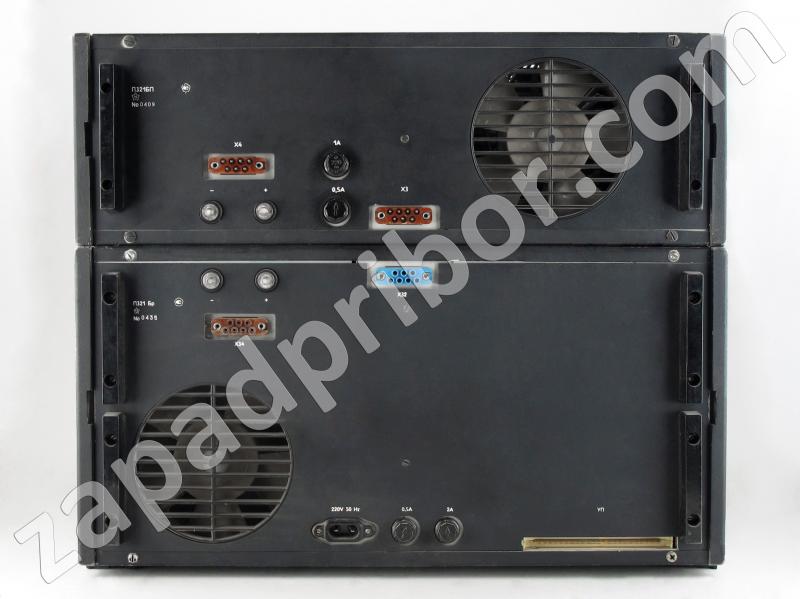
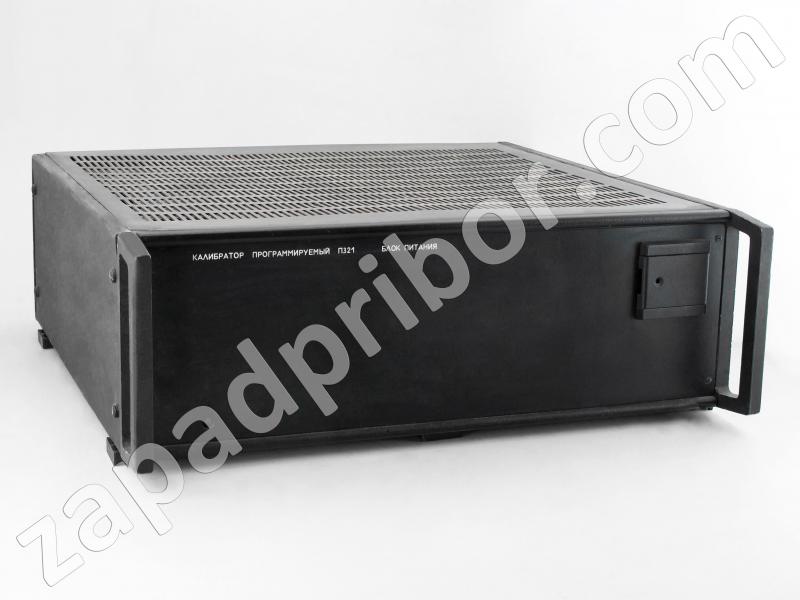
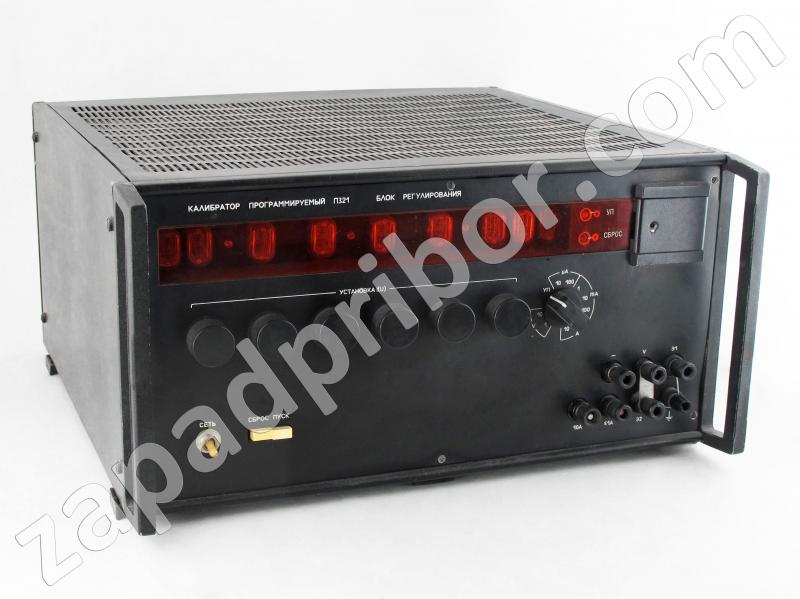
Programmable current calibrator P321
Also, this device can be called: P-321, P 321.
P321 programmable current calibrator is a precision calibrated source currents and voltages with manual and program control and is designed for use in automated calibration settings, as well as a separate device for verification of analog and digital DC appliances.
Specifications P321:
Range issued calibrated currents for CT - 10-9 A to 10 A (finite values - 10 mcA, 100 mcA, 1 mA, 10 mA, 100 mA, 1 A, 10 A).
Range issued calibrated voltage mode KH - from 10-5 to 10 V (finite values - 1 V, 10 V).
Calibrated values of currents and voltages are fixed on the light board.
Calibrated current setting increment:
- on bands with finite values of 10 mcA, 100 mcA and 1 mA - 1 nA;
- on bands with finite values of 10 mA, 100 mA - 10 nA; 100 nA;
- on bands with finite values of 1 A, 10 A - 1 mcA, 10 mcA.
Readability setting calibrated voltage - 10 mV.
Calibrators P321 can be manually controlled switches on the front panel, or commands from an external connector UP.
Control software provides:
- startup and shutdown commands calibrator "Start" and "Reset", respectively;
- installation of the final value of the calibrated range and level of current and voltage.
Output accuracy calibrated voltages and currents, as well as the maximum permissible error of the relative values of the calibrated voltages and currents after zeroing and calibration are given in the table below:
| Limit calibrated voltages (currents) | Limit of acceptable relative error values calibrated currents (voltages) | Limit of acceptable basic error calibrator calibrated mode currents (voltages) |
| 10 mcA | ±(0,1·Iк+1) nA | ±(10·Iк(0,01+γ1+γ2)+2) nA |
| 100 mcA | ±(0,05·Iк+1) nA | ±(10·Iк(0,005+γ1+γ2)+1) nA |
| 1 mA | ±(0,05·Iк+0,01) mcA | ±(10·Iк(0,005+γ1+γ2)+0,01) mcA |
| 10 mA | ±(0,05·Iк+0,1) mcA | ±(10·Iк(0,005+γ1+γ2)+0,1) mcA |
| 100 mA | ±(0,05·Iк+1) mcA | ±(10·Iк(0,005+γ1+γ2)+1) mcA |
| 1 A | ±(0,1·Iк+0,05) mA | ±(10·Iк(0,01+γ1+γ2)+0,05) mA |
| 10 A | ±(0,1·Iк+0,5) mA | ±(10·Iк(0,01+γ1+γ2)+0,5) mA |
| 1 V | ±(30·Uk+10) mcV | ±(30·Uk+γ1 Uk·104+10) mcV |
| 10 V | ±(20·Uk+50) mcV | ±(20·Uk+γ1 Uk·104+50) mcV |
where γ1, γ2 - dimensionless quantities are numerically equal accuracy class of a normal element and measures the electrical resistance, used for calibration.
Limit of acceptable error calibrator P321 for 3 months of work specified in the table below:
| Limit calibrated voltages (currents) | Limit of acceptable basic error calibrator for 3 months work | |
| tuning in daily zeros | without adjusting zero and calibration | |
| 10 mcA | ±(10·Iк(0,01+γ1+γ2)+5) nA | ±(10·Iк(0,01+γ1+γ2)+12) nA |
| 100 mcA | ±(10·Iк(0,005+γ1+γ2)+5) nA | ±(10·Iк(0,005+γ1+γ2)+10) nA |
| 1 mA | ±(10·Iк(0,005+γ1+γ2)+0,05) mcA | ±(10·Iк(0,005+γ1+γ2)+0,1) mcA |
| 10 mA | ±(10·Iк(0,005+γ1+γ2)+0,5) mcA | ±(10·Iк(0,005+γ1+γ2)+1) mcA |
| 100 mA | ±(10·Iк(0,005+γ1+γ2)+5) mcA | ±(10·Iк(0,005+γ1+γ2)+20) mcA |
| 1 A | ±(10·Iк(0,01+γ1+γ2)+0,1) mA | ±(10·Iк(0,01+γ1+γ2)+1,5) mA |
| 10 A | ±(10·Iк(0,01+γ1+γ2)+1) mA | ±(10·Iк(0,01+γ1+γ2)+15) mA |
| 1 V | ±(30· Uk+γ1· Uk·104+50) mcV | ±(30· Uk+γ1· Uk·104+150) mcV |
| 10 V | ±(20· Uk+γ1· Uk·104+100) mcV | ±(20· Uk+γ1· Uk·104+1000) mcV |
Setup time calibrator P321 - no more than 1 hour.
Continuous operation of the calibrator, excluding setup time in the working conditions of use - at least 8 hours a break to re-enable calibrators - not less than 1 hour.
Instability calibrated current (voltage) due to internal fluctuation noise level calibrator, and the rms value of the variable component at the output of the calibrator in the frequency up to 1 MHz is listed in the table below:
| Limit calibrated voltages (currents) | Instability calibrated current (voltage) | The level of the variable component in the band | |
| 100 kHz | 1 MHz | ||
| 10 uA | 0,5 nA | 1 nA | 2 nA |
| 100 uA | 5 nA | 10 nA | 20 nA |
| 1 mA | 10 nA | 50 nA | 100 nA |
| 10 mA | 0,1 uA | 0,5 uA | 1 uA |
| 100 mA | 1 uA | 5 uA | 10 uA |
| 1 A | 20 uA | 300 uA | 500 uA |
| 10 A | 0,2 mA | 3 mA | 5 mA |
| 1 | 10 mV | 300 uV | 500 mV |
| 10 | 50 mV | 300 uV | 500 mV |
Limit of acceptable calibrator additional error caused by changes in ambient temperature from the temperature at which the calibration is performed, to any temperature within the operating temperature for every 10° C:
- on all bands than 1 A and 10 A - the limit of acceptable basic error;
- on bands 1 A, 10 A - double the limit of acceptable basic error.
Calibrator provides P321 load voltage mode CT and load current mode on CN ranges:
- with a final value of 10 mcA, 100 mcA, 1 mA, 10 mA, 100 mA - not more than 30 V;
- a final value 1 A - no more than 10 V;
- with a final value of 10 A - not more than 2 V;
- with a final 1, 10 - not more than 1 A.
Limit of acceptable calibrator additional error caused by the change in voltage at the load of 10% to the permissible values in CT mode equal to the limit of acceptable basic error.
Limits of additional error calibrator values due to changes in load current 10% to a valid value in the mode of the CN, equal to the limit of acceptable basic error.
Margin adjustment trimming elements needed for calibration, with the release of the calibrator - not less than 20% of the control range.
Time to establish a calibrated current - no more than 5 seconds.
Electrical resistance between the terminal «╧» calibrator and housing - no more than 0,5 Ohms.
Insulation between the body and the network can withstand for 1 min test voltage AC 50 Hz with the current value of 1.5 kV.
The insulation resistance between the case and the P321 scheme isolated areas specified in the table below:
| Calibrator circuit sections between which the measured insulation resistance | Insulation resistance | |
| 1. The combined output terminals | Clip "EI" | 109 Ohm |
| 2. The combined output terminals | Clip «╧» | |
| 3. Clip "EI" | ||
| 4. Network 220 V | 108 Ohm | |
Level control of the output current (voltage) is carried out in BCD 8-4-2-1.
Teams are made with a signal of logical "1" with respect to clamp «╧».
Logical signal "1" corresponds to the voltage level of 2.4 V to 5.25 V.
Signal logic "0" corresponds to the voltage level of 0.4 V to 0.5 V.
Disable the output of the calibrator P321 command "Reset" signal is accompanied by the presence of a logical "1" on track "P" connector UP.
Connector pins UP:
- run command - A;
- reset command - P;
- set the end value 10 mcA - C;
- set the end value 100 mcA - T;
- set the end value 1 mA - Y;
- Set the end value 10 mA - X;
- set the end value 100 mA - C;
- set the end value 1 A - 12;
- set the end value 10 A - 13;
- set the end value 1 V - F;
- set the end value 10 V - 17;
- set the output current (voltage) 8·10-1 - B;
- set the output current (voltage) 4·10-1 - V;
- set the output current (voltage) 2·10-1 - G;
- set the output current (voltage) 1·10-1 - D;
- set the output current (voltage) 8·10-2 - E;
- set the output current (voltage) 4·10-2 - Zh;
- set the output current (voltage) 2·10-2 - Z;
- set the output current (voltage) 1·10-2 - I;
- set the output current (voltage) 8·10-3 - K;
- set the output current (voltage) 4·10-3 - L;
- set the output current (voltage) 2·10-3 - M;
- set the output current (voltage) 1·10-3 - N;
- set the output current (voltage) 8·10-4 - 5;
- set the output current (voltage) 4·10-4 - 6;
- set the output current (voltage) 2·10-4 - 7;
- set the output current (voltage) 1·10-4 - 8;
- set the output current (voltage) 8·10-5 - 9;
- set the output current (voltage) 4·10-5 - 10;
- set the output current (voltage) 2·10-5 - 11;
- set the output current (voltage) 1·10-5 - 15;
- set the output current (voltage) 8·10-6 - 16;
- set the output current (voltage) 4·10-6 - 18;
- set the output current (voltage) 2·10-6 - 19;
- set the output current (voltage) 1·10-6 - 21.
Power consumption - not more 350 V·A.
Dimensions calibrator P321:
- control unit - 488×250×535 mm;
- power supply - 488×170×535 mm.
Weight P321:
- control unit - no more than 25 kg;
- power supply - no more than 20 kg.
Operating conditions P321:
Ambient temperature - +10° C to +35° C.
Relative humidity at +25° C - 80%.
Calibrator programmable P320 withstands temperatures from -50° C to +60° C.
Calibrator relative humidity 95% at +40° C.
Capacity of the power calibrators:
- frequency - 50±1 Hz, 60 Hz±1,2;
- voltage - 220±22 V.
Leading online store Zapadpribor - a huge selection of measuring equipment for the best value and quality. So you can buy inexpensive devices, we monitor competitors' prices and are always ready to offer a lower price. We only sell quality products at the best prices. On our site you can buy cheaply as the latest innovations and proven equipment from the best manufacturers.
The site includes a special offer «buy at the best price» - if other Internet resources (bulletin board, forum or announcement of another online service) in products presented on our site, the lower price, we will sell it to you even cheaper! Buyers also additional discount for leaving a review or photo of use of our products.
In the price list contains not the whole range of products offered. Prices of goods, not included in the price list can learn to contact the manager. Also, our managers You can get detailed information about how cheap and profitable to buy instrumentation wholesale and retail. Telephone and e-mail for advice on the purchase , delivery or receipt are shown on the description of the goods. We have the most qualified staff, quality equipment and the best price.
Online store Zapadpribor - the official manufacturer's dealer test equipment. Our goal - selling high quality goods with best price offer and service to our customers. Our store can not only sell you the necessary instrument, but also offer additional services to its calibration, repair and installation. That you have a pleasant experience when shopping on our site, we have provided special gifts guaranteed to the most popular products.
We offer fast international shipping to almost every country in the world: Australia, Austria, Azerbaijan, Albania, Algeria, Anguilla, Angola, Antigua and Barbuda, Argentina, Aruba, Bahamas, Bangladesh, Barbados, Bahrain, Belize, Belgium, Benin, Bermuda, Bulgaria, Bolivia, Bonaire, Sint-E. and Saba, Bosnia and Herzegovina, Botswana, Brazil, British Virgin Islands, Brunei Darussalam, Burkina Faso, Burundi, Bhutan, VietNam, Vanuatu, Vatican City, Venezuela, Armenia, Gabon, Guyana, Haiti, Gamia, Gambia, Ghana, Guatemala, Guinea, Gibraltar, Honduras, Hong Kong, Grenada, Greenland, Greece, Georgia, Denmark, Democratic Republic of the Congo, Jersey, Djibouti, Dominica, Dominican Republic, Ecuador, Eswatine, Estonia, Ethiopia, Egypt, Zambia, Zimbabwe, Jordan Indonesia, Ireland, Iceland, Spain, Italy, Cape Verde, Kazakhstan, Cayman Islands, Cambodia, Cameroon, Canada, Qatar, Kenya, Kyrgyzstan, China, Cyprus, Kiribati, Colombia, Comoros, Congo, Korea (Rep.), Costa Rica, Kot-d'Ivoire, Cuba, Kuwait, Curacao, Laos, Latvia, Lesotho, Lithuania, Liberia, Lebanon, Libya, Liechtenstein, Luxembourg, Myanmar, Mauritius, Mauritania, Madagascar, Macao, Malawi, Malaysia, Mali, Maldives, Malta, Morocco, Mexico, Mozambique, Moldova, Monaco, Monaco, Namibia, Nauru, Nepal, Niger, Nigeria, Netherlands, Germany, New Zealand, New Caledonia, Norway, UAE, Oman, Cook Islands, Pakistan, Palestine, Panama, Papua New Guinea, Paraguay, Peru, South Africa, Poland, Portugal, Republic of Chad, Rwanda, Romania, El Salvador, Samoa, San Marino, Saudi Arabia, Swaziland, Seychelles, Senegal, Saint Vincent and the Grenadines, Saint Kitts and Nevis, Saint Lucia, Serbia, Singapore, Sint Maarten, Slovakia, Slovenia, Solomon Islands, United Kingdom of Great Britain and Northern Ireland, Sudan, Suriname, East Timor (Timor-Leste), USA, Sierra Leone, Tajikistan, Taiwan, Thailand, Tanzania (United Republic of), Togo, Tonga, Trinidad and Tobago, Tuvalu, Tunisia, Turkey, Turkmenistan, Uganda, Hungary, Uzbekistan, Uruguay, Faroe Islands, Fiji, Philippines, Finland, France, French Polynesia, Croatia, Central African Republic, Czech Republic, Chile, Montenegro, Switzerland, Sweden, Sri Lanka, Jamaica, Japan.
We also provide such metrological procedure: calibration, tare, graduated, testing of measuring instruments.
The online store takes an active part in such procedures as electronic bidding, tender, auction.
If there is no site in the descriptive information you need on the device you can always turn to us for help. Our qualified managers will update for you on the technical characteristics of the device from its technical documentation: user manual, certificate, form, operating instructions, diagram. If necessary, we will take a photo of your device, or a device stand. You can leave feedback on the unit purchased from us, the meter, the device, indicator, or product. Your review for your approval will be published on the site without contact information.
Description of the instruments taken from the technical documentation or technical literature. Most pictures of products made directly by our experts prior to shipment of goods. In the description of the device provided the main technical characteristics of the instrument: nominal measuring range, accuracy class, scale, supply voltage, size (size), weight. If the site you see the discrepancy device name (model) specifications, photo or documents attached - let us know - you will get a useful gift with-selling device.
While the need to clarify the overall weight and size or the size of the individual meter you can in our service center. If you need our engineers will help you choose the most complete analog or a suitable replacement for the device you are interested. All counterparts and replacement will be tested in one of our laboratories with the full compliance to your requirements.
In the technical documentation for each device or product, information is provided on the list and amount of precious metals content. The documentation gives the exact weight in grams of precious metals: Au gold, palladium Pd, platinum Pt, silver Ag, tantalum Ta and other platinum group metals (PGM) per unit item. These precious metals are found in nature in very limited quantities and therefore have such a high price.
On our website you can familiarize yourself with the technical characteristics of devices and obtain information on the content of precious metals in devices and radio components manufactured in the USSR. We draw your attention to the fact that often the actual content of precious metals differs by 10-25% from the reference one in a smaller direction! The price of precious metals will depend on their value and mass in grams.
All text and graphic information on the site is informative. The color, shade, material, geometric dimensions, weight, content, delivery set and other parameters of the goods presented on the site may vary depending on the batch of production and year of manufacture. Check with the sales department for more information.
If you can make repairs to the device yourself, our engineers can provide you with a complete set of necessary technical documentation: circuit diagram TO, ER, FD, PS. We also have an extensive database of technical and metrological documents: technical specifications (TS), the terms of reference (TOR), GOST (DSTU), the industry standard (OST) test procedure, the method of certification, verification scheme for more than 3,500 types of measuring equipment from the manufacturer this equipment. From the site you can download all the necessary software (the software driver) is required for the product purchased.
We carries out repairs and maintenance of measuring equipment in more than 75 different factories of the former Soviet Union and CIS.
We also have a library of legal documents that are related to our field of activity: the law, code, ordinance, decree, temporary position.
