|
Price:
on request
Product information updated 01 February 2026.
Found cheaper?
Let us know. Our price is the best.
Warranty:
12 months.
Warranty extension up to 5 years.
Terms of delivery:
To all regions of the country, international delivery.
Product information updated 01 February 2026.
Found cheaper?
Let us know. Our price is the best.
Warranty:
12 months.
Warranty extension up to 5 years.
Terms of delivery:
To all regions of the country, international delivery.
Technical characteristics
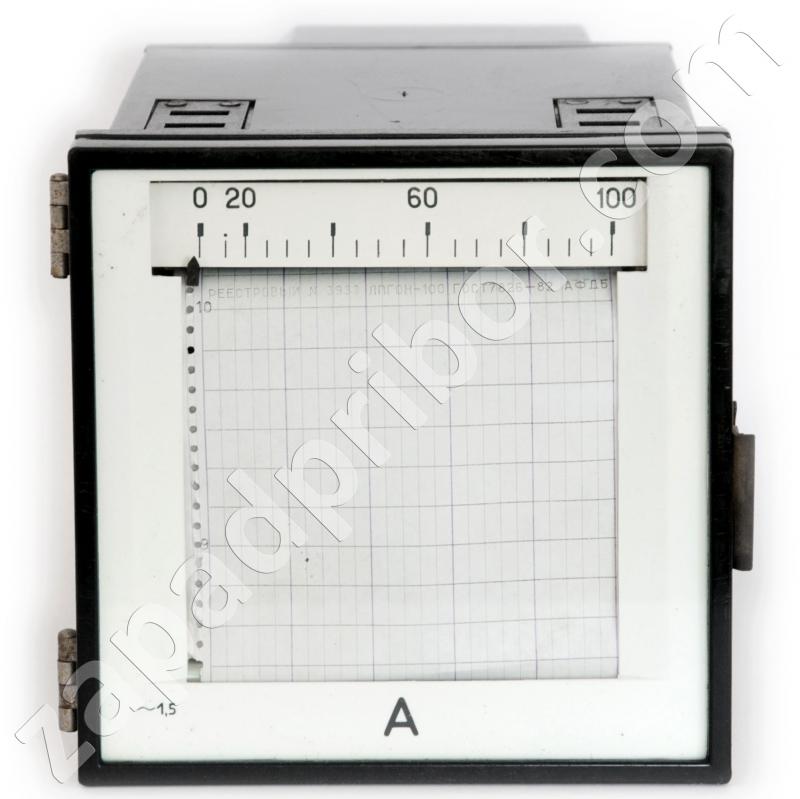
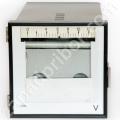
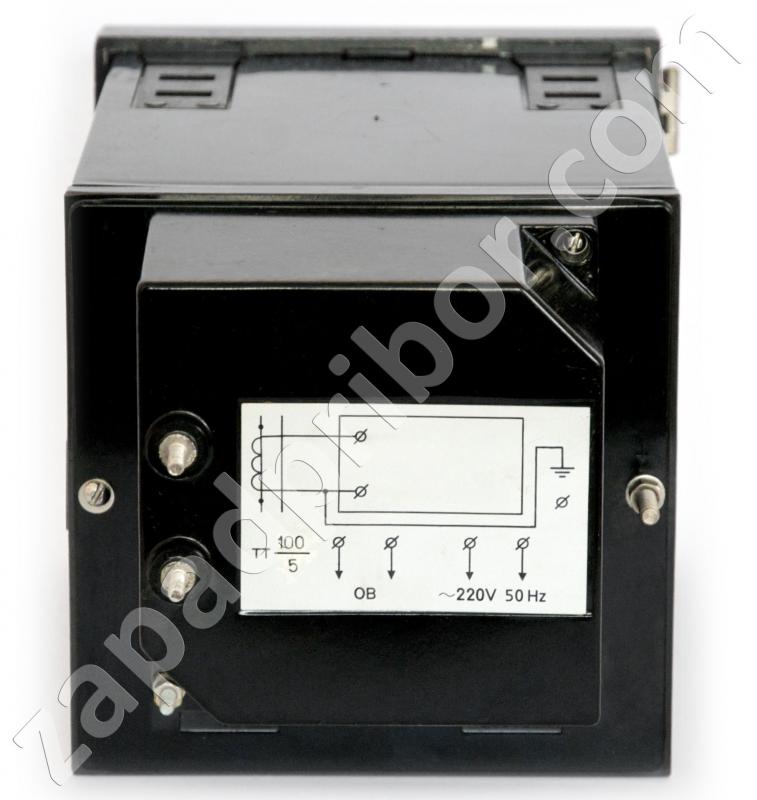
N3093 ammeter, voltmeter N3093 recorders (N 3093, N-3093, h3093, h 3093, h-3093)
Designed for continuous measurement and recording values of voltage and current in circuits of single-phase alternating current in the frequency range 45-65 Hz. The devices can be manufactured to operate in the normal range 45-1000 Hz frequency workspace from 45 to 10,000 Hz.
Limit of acceptable basic error on the measurement and recording of the measured values is ± 1,5%.
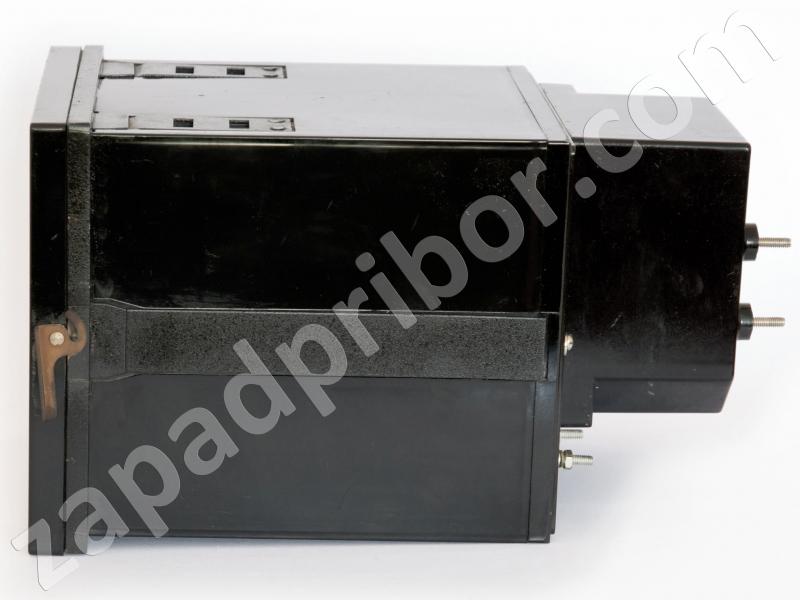
Overall dimensions of the unit must be 160x160x195mm.
N3093 ammeters, voltmeters N3093 recorders (hereinafter - instruments) are designed for continuous measurement and recording the values of voltage and current in circuits of single-phase alternating current in the frequency range 45-65 Hz. The devices can be manufactured to operate in the normal range 45-1000 Hz frequency workspace from 45 to 10,000 Hz.
Ammeter and voltmeter N3093 intended for use in enclosed dry heated rooms at an ambient temperature of 0 to 50 ° C and 90% relative humidity at 25 ° C.
Ammeter and voltmeter N3093 supplied to areas with a tropical climate (symbol N3093 TO 4.2 **), designed to operate in ambient temperatures from 0 to 50 ° C and relative humidity. 95% at 40 ° C.
Technical data
The final value of the measuring range devices are given in Table 1. Limit of acceptable basic error on the measurement and recording of the measured value is equal to:
± 1,5% - for units with a normal region of frequencies of 45-65 Hz;
± 2,5% - for devices with a normal frequency region 45-1000 Hz, the final value of the measuring range.
Limit of acceptable total error N3093 devices for recording the measured value is equal to:
± 1,5% - for appliances with the normal region of frequencies, 45-65Hz;
± 2,5% - for appliances with the normal region of frequencies, 45-1000Hz, - the final value of the measuring range.
Limit of acceptable basic error recording time is ± 0,5%. The allowed limit additional error instruments due to changes in ambient temperature from normal to any temperature in the range from 0 to 50 ° C, equal to the limit of acceptable basic error for every 10 ° C change in temperature.
The allowed limit additional error N3093 devices to measure and record the measured value caused by changes in the position of devices from its normal position in any direction by ± 5 °, and is equal to the limit of acceptable basic error.
The allowed limit additional error N3093 devices to measure and record the measured value under the influence of an external uniform magnetic field, the time-varying sinusoidally with a frequency equal to the frequency of the current flowing through the measuring circuit device under test, under the most unfavorable direction and phase of the magnetic field equal to the limit acceptable basic error. The magnetic induction:
for a frequency of 50 Hz and 1000 Hz - 0.5 mT;
for a frequency of 10,000 Hz - 0.05 mT.
The allowed limit additional error N3093 devices to measure and record the measured value caused by the installation. ferromagnetic shield thickness (2 ± 0,5) mm, equal to ± 0,5% of full scale range. Limit of acceptable additional error of measurement devices and recording of measured values caused by the deviation of frequency, equal to the limit of acceptable basic error:
frequency deviation of ± 10% of the normal limits of the frequency range - for units with a normal frequency region 45-65Hz;
frequency deviates from the limits of the normal range of frequencies up to any frequency in the working frequency range - N3093 for devices with a normal frequency region 45-1000Hz.
Limit of acceptable additional error of measurement devices and record the measured value due to changes in supply voltage of ± 10% of nominal, equal to the limit of acceptable basic error.
Limit of acceptable additional error of measurement devices and recording the measured values due to the stress placed back to back with him of the same instrument, used to be located at a distance of 1 m is equal to ± 0,5% of full scale range.
Time setting the readings does not exceed 2., The value of the first pointer Swapping does not exceed 7% of the width of the field recording. The drift of the zero-line appliance within 30 days of not more than 1.5 mm. Failure to return a writing device (pointer) of the device to the zero line (the zero point of the scale) is not more than 1.5 mm. A disagreement of the zero line of the diagram printed on the tape, with the line entries received when the cursor to the zero mark of the scale, not more than 0.75 mm.
The line width of the recording is not more than 0.7 mm. Warm-up time 1 hour of continuous operation time is not limited. Record readings made ball rod UPS-3-107-1 ,0-300 or blue ink on chart paper with holes on a nominal width of 100 mm field of the record. Power supply device is supplied from the AC voltage (220 ± 22), (50 ± 1) Hz or (60 +1.2) Hz - at the request of the customer.
Power consumption devices N3093 does not exceed:
measuring circuit - 1V • A;
food chain - 12V • A.
Continuous ink recording device for a single ink tank refueling or a ball pivot at least 60 days. To move the chart tape applied synchronous motor powered by an AC voltage of 220V, 50Hz or 60 Hz for devices N3093 sold for export. Nominal values of the chart speed tape 20, 60, 180, 600, 1800, 5400 mm / h
Variation of the substitution is made changeable gears. The insulation between the casing and insulated from the housing electric circuits of the device (other than the application time stamp circuit) as well as insulation between the separate circuits to withstand normal operating conditions for 1 min. test voltage of the AC frequency (50 ± 1) Hz, the mean value of which is:
1.5 kW - for ammeters, voltmeters, for inclusion via voltage transformers and voltmeters direct connection with the end of the measuring range 15V, 25V, 50V, 150V, 250V.
Note. Voltmeters for direct connection to the finite range of 500 and 600 V insulation between the body and the measuring circuit, as well as between the measuring circuit and the power supply must withstand a test voltage of 2 kV.
The insulation resistance between the casing and insulated from the casing of any electrical circuit device under normal operating conditions is not less than 40 MΩ.
Overall dimensions of the unit should be 160x160x195 mm. Total overall size of the inverter 160x160x280 mm. Unit weight is not more than 4.6 kg. In accordance with the order ammeter and voltmeter N3093 comes with a record of testimony in ink or ink and ball rod.
Table 1.
| Device name | The final value of the measuring range | A way to incorporate |
| Ammeter | 5mA, 15mA, 25mA, 50mA, 150mA, 250mA, 500mA | Directly |
| 1 A, 1.5 A, 2.5 A, 5 A | ||
| 1A, 5A, 10A, 15 A, 20 A, 30 A, 40 A, 50 A, 75 A; | Through the current transformer with a secondary current of 1 A or 5 A | |
| 80 A, 100 A, 150 A, 200 A, 300 A, 400 A; | ||
| 500 A, 600 A, 750 A, 800 A | ||
| 1kA; 1kA, 2ka, 1.5 kA 2ka; 3kA; 4ka | Through current transformers with secondary current 1A | |
| 1 kA, 1.2 kA, 1, 5 kA 2ka; 3kA; 4ka; 5kA; 6 kA; 8kA; 10kA; | Through current transformers with secondary current 5A | |
| 12kA, 15kA, 20kA, 25kA, 30 kA, 40 kA | ||
| Voltmeter | 15 V 25 V 50 V 150 V 250 V 500 V 600 V | Directly |
| 500 V, 600 V, 750 V | Through voltage transformers with secondary voltage 100V | |
| 4 V 7.5 V 12 V 5 V, 15 V, 20 V, 25 V, 40 V, 150 V; | ||
| 200 kV, 250 kV, 400 kV, 600sq |
Note: devices with the inclusion of a current and voltage transformers are designed to work only for the normal frequency range of 45-65 Hz.
Leading online store Zapadpribor - a huge selection of measuring equipment for the best value and quality. So you can buy inexpensive devices, we monitor competitors' prices and are always ready to offer a lower price. We only sell quality products at the best prices. On our site you can buy cheaply as the latest innovations and proven equipment from the best manufacturers.
The site includes a special offer «buy at the best price» - if other Internet resources (bulletin board, forum or announcement of another online service) in products presented on our site, the lower price, we will sell it to you even cheaper! Buyers also additional discount for leaving a review or photo of use of our products.
In the price list contains not the whole range of products offered. Prices of goods, not included in the price list can learn to contact the manager. Also, our managers You can get detailed information about how cheap and profitable to buy instrumentation wholesale and retail. Telephone and e-mail for advice on the purchase , delivery or receipt are shown on the description of the goods. We have the most qualified staff, quality equipment and the best price.
Online store Zapadpribor - the official manufacturer's dealer test equipment. Our goal - selling high quality goods with best price offer and service to our customers. Our store can not only sell you the necessary instrument, but also offer additional services to its calibration, repair and installation. That you have a pleasant experience when shopping on our site, we have provided special gifts guaranteed to the most popular products.
We offer fast international shipping to almost every country in the world: Australia, Austria, Azerbaijan, Albania, Algeria, Anguilla, Angola, Antigua and Barbuda, Argentina, Aruba, Bahamas, Bangladesh, Barbados, Bahrain, Belize, Belgium, Benin, Bermuda, Bulgaria, Bolivia, Bonaire, Sint-E. and Saba, Bosnia and Herzegovina, Botswana, Brazil, British Virgin Islands, Brunei Darussalam, Burkina Faso, Burundi, Bhutan, VietNam, Vanuatu, Vatican City, Venezuela, Armenia, Gabon, Guyana, Haiti, Gamia, Gambia, Ghana, Guatemala, Guinea, Gibraltar, Honduras, Hong Kong, Grenada, Greenland, Greece, Georgia, Denmark, Democratic Republic of the Congo, Jersey, Djibouti, Dominica, Dominican Republic, Ecuador, Eswatine, Estonia, Ethiopia, Egypt, Zambia, Zimbabwe, Jordan Indonesia, Ireland, Iceland, Spain, Italy, Cape Verde, Kazakhstan, Cayman Islands, Cambodia, Cameroon, Canada, Qatar, Kenya, Kyrgyzstan, China, Cyprus, Kiribati, Colombia, Comoros, Congo, Korea (Rep.), Costa Rica, Kot-d'Ivoire, Cuba, Kuwait, Curacao, Laos, Latvia, Lesotho, Lithuania, Liberia, Lebanon, Libya, Liechtenstein, Luxembourg, Myanmar, Mauritius, Mauritania, Madagascar, Macao, Malawi, Malaysia, Mali, Maldives, Malta, Morocco, Mexico, Mozambique, Moldova, Monaco, Monaco, Namibia, Nauru, Nepal, Niger, Nigeria, Netherlands, Germany, New Zealand, New Caledonia, Norway, UAE, Oman, Cook Islands, Pakistan, Palestine, Panama, Papua New Guinea, Paraguay, Peru, South Africa, Poland, Portugal, Republic of Chad, Rwanda, Romania, El Salvador, Samoa, San Marino, Saudi Arabia, Swaziland, Seychelles, Senegal, Saint Vincent and the Grenadines, Saint Kitts and Nevis, Saint Lucia, Serbia, Singapore, Sint Maarten, Slovakia, Slovenia, Solomon Islands, United Kingdom of Great Britain and Northern Ireland, Sudan, Suriname, East Timor (Timor-Leste), USA, Sierra Leone, Tajikistan, Taiwan, Thailand, Tanzania (United Republic of), Togo, Tonga, Trinidad and Tobago, Tuvalu, Tunisia, Turkey, Turkmenistan, Uganda, Hungary, Uzbekistan, Uruguay, Faroe Islands, Fiji, Philippines, Finland, France, French Polynesia, Croatia, Central African Republic, Czech Republic, Chile, Montenegro, Switzerland, Sweden, Sri Lanka, Jamaica, Japan.
We also provide such metrological procedure: calibration, tare, graduated, testing of measuring instruments.
The online store takes an active part in such procedures as electronic bidding, tender, auction.
If there is no site in the descriptive information you need on the device you can always turn to us for help. Our qualified managers will update for you on the technical characteristics of the device from its technical documentation: user manual, certificate, form, operating instructions, diagram. If necessary, we will take a photo of your device, or a device stand. You can leave feedback on the unit purchased from us, the meter, the device, indicator, or product. Your review for your approval will be published on the site without contact information.
Description of the instruments taken from the technical documentation or technical literature. Most pictures of products made directly by our experts prior to shipment of goods. In the description of the device provided the main technical characteristics of the instrument: nominal measuring range, accuracy class, scale, supply voltage, size (size), weight. If the site you see the discrepancy device name (model) specifications, photo or documents attached - let us know - you will get a useful gift with-selling device.
While the need to clarify the overall weight and size or the size of the individual meter you can in our service center. If you need our engineers will help you choose the most complete analog or a suitable replacement for the device you are interested. All counterparts and replacement will be tested in one of our laboratories with the full compliance to your requirements.
In the technical documentation for each device or product, information is provided on the list and amount of precious metals content. The documentation gives the exact weight in grams of precious metals: Au gold, palladium Pd, platinum Pt, silver Ag, tantalum Ta and other platinum group metals (PGM) per unit item. These precious metals are found in nature in very limited quantities and therefore have such a high price.
On our website you can familiarize yourself with the technical characteristics of devices and obtain information on the content of precious metals in devices and radio components manufactured in the USSR. We draw your attention to the fact that often the actual content of precious metals differs by 10-25% from the reference one in a smaller direction! The price of precious metals will depend on their value and mass in grams.
All text and graphic information on the site is informative. The color, shade, material, geometric dimensions, weight, content, delivery set and other parameters of the goods presented on the site may vary depending on the batch of production and year of manufacture. Check with the sales department for more information.
If you can make repairs to the device yourself, our engineers can provide you with a complete set of necessary technical documentation: circuit diagram TO, ER, FD, PS. We also have an extensive database of technical and metrological documents: technical specifications (TS), the terms of reference (TOR), GOST (DSTU), the industry standard (OST) test procedure, the method of certification, verification scheme for more than 3,500 types of measuring equipment from the manufacturer this equipment. From the site you can download all the necessary software (the software driver) is required for the product purchased.
We carries out repairs and maintenance of measuring equipment in more than 75 different factories of the former Soviet Union and CIS.
We also have a library of legal documents that are related to our field of activity: the law, code, ordinance, decree, temporary position.
